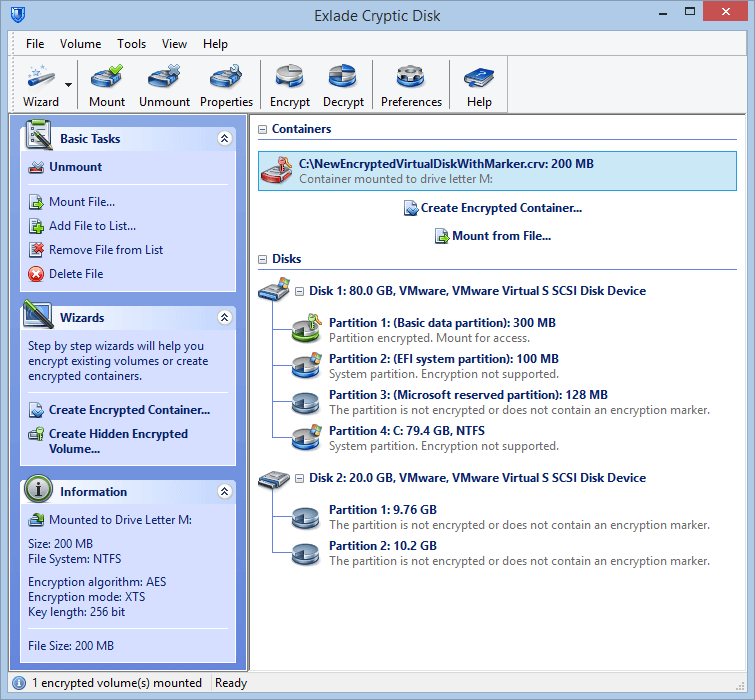
An encrypted container is an ordinary encrypted file that can be connected (mounted) to any free volume letter and you can work with such a volume as with a normal one. Sometimes it is called a virtual encrypted volume. All the data written to the volume is automatically encrypted. Any moment the volume is disconnected (unmounted), the access to the data is blocked. Upon system shutdown all the encrypted volumes are automatically unmounted. To re-mount a volume you have to enter the password (and/or key files) that you have specified upon creating the volume. After you mount the encrypted virtual volume all the files on it become accessible and the software will automatically decipher them when reading (encrypt them when writing). A file in the encrypted container can be copied, moved or deleted, i.e. you can handle it as an ordinary file.
![]()
To create an encrypted container you need special expert software for encryption - Cryptic Disk. Don’t be alarmed by the word “expert”. The software is actually designed for professional protection of the information in accordance with the multiple standards but at the same time it has a simple and friendly interface; the step-by-step wizards will help you to create encrypted containers without any problem.
To download Cryptic Disk go to:
www.exlade.com/en/cryptic-disk/download
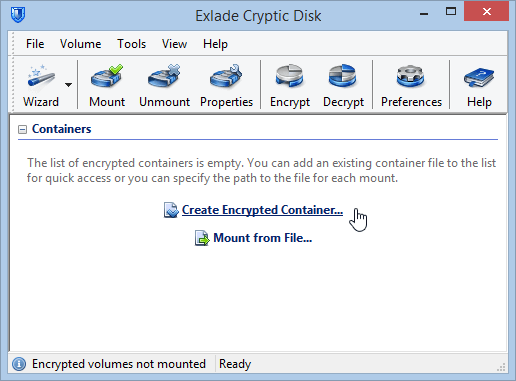
1. Launch Cryptic Disk (in the “Start” menu or by clicking the desktop label), and the main window of application will be displayed.
2. Left-click the link “Create an encrypted container”.
A step-by-step wizard for creating encrypted containers will be launched. The general recommendation is not to change any options and proceed, but we will go through all them in details.
3. Specify a container file path. The file of the encrypted virtual volume will be located there and all your files will be stored encrypted. Also specify the file size. The parameter determines the volume of the virtual encrypted volume. 200 Mb is quite enough for storing documents, but if you are going to store also video, music and other “heavy” files you should allocate more space.

If you don’t enable the “Write the marker in the encrypted container header” option no one will be able to prove that the file is an encrypted virtual volume. If you are not going to prove to anyone that the file is an unencrypted one and its contents is just some unsorted “garbage” you can tick this box to enable the option. It helps the application to detect that the file is encrypted and puts a respective sign for it in the interface. This option doesn’t affect the protection reliability.
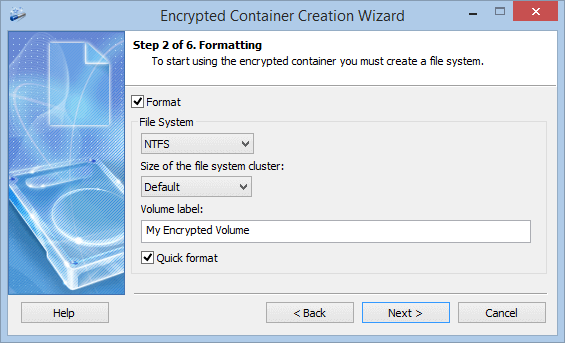
4. Configure the formatting parameters. The container file is a new virtual disk image. Format the volume before starting to work with it. Also you can select a file system, a cluster size and a volume label which will be displayed for the mounted volume in the Explorer. You can disable the format option. Then the software will not format the virtual drive at all and you will be able to format it on your own after mounting it.
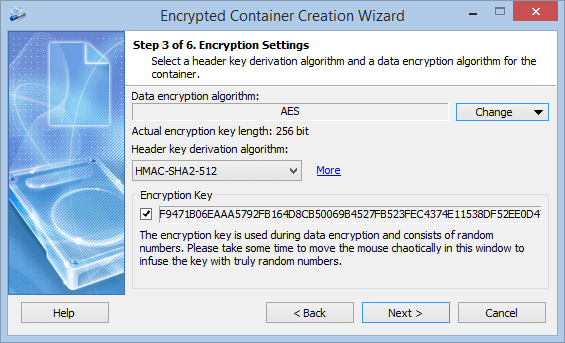
5. Configure the encryption parameters. If you are not an expert in cryptography you can just leave this as is and go to the next stage. Otherwise you can change the cryptographic algorithms that are to be used for encrypting the volume data (Click the “Change …” button…”).
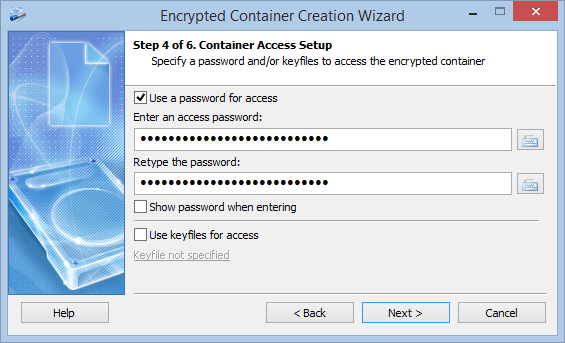
6. Specify the password and if you want you can specify the key files that are to be used for protecting the access to the encrypted data. To protect against key loggers you can use the virtual keyboard embedded into the software. The software will ask the password upon each mounting of the encrypted container.
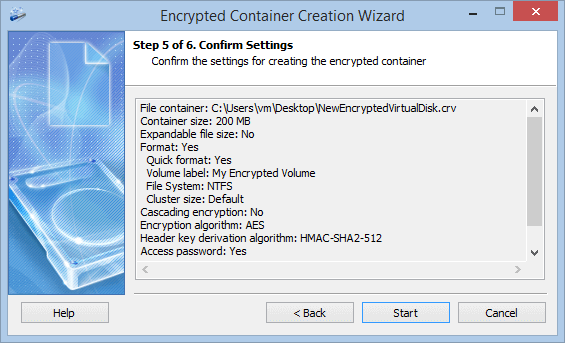
7. All the parameters of the new encrypted container are configured. Check them out in the wizard window and click the “Start” button”.
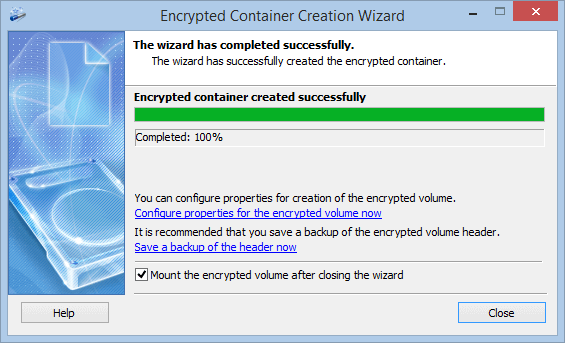
8. When the wizard finishes its work a respective message will be displayed and you will be asked if you want to configure the advanced parameters for the encrypted volume, save a backup copy of the header and mount the encrypted container.
Mounting
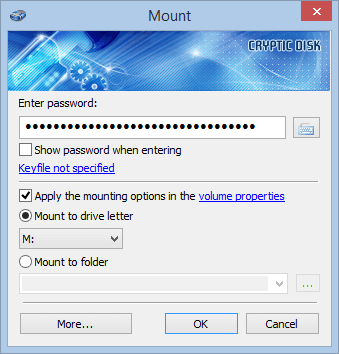
Leave the “Mount the encrypted volume after closing the wizard” option and close the wizard window. The mounting window will be opened. Enter the password that you specified when creating the new encrypted container and select any free letter for the container. Click the “OK” button.
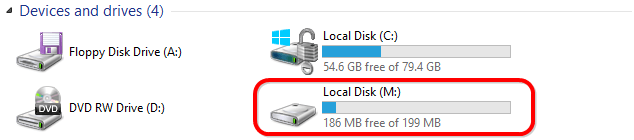
If you enter the correct password the system will display the volume with the letter specified when mounting. You can work with it in the same way as with any normal volume, i.e. copy, modify, replace and delete files. The only difference is that all the data of the volume is actually stored encrypted all the time.
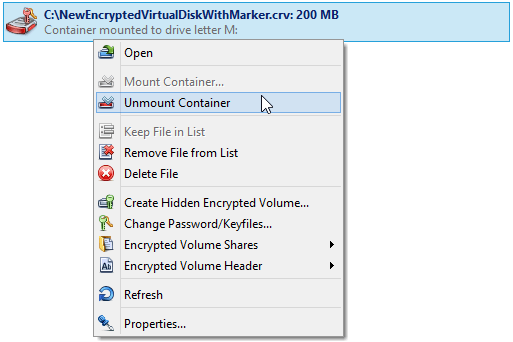
To block access to the encrypted virtual volume you have to unmount the volume (it will be also automatically unmounted upon system shutdown). You can use the main window of the software or the system tray icon menu.

The core of the software icon in the system tray is red when the system detects at least one mounted encrypted volume.
For more convenient work you can configure the encrypted volume “Properties”. Select the encrypted volume in the main window and right-click it, then select the “Properties…” option in the context menu. Here you can configure mounting parameters specifically for this encrypted volume, set hotkeys, add scripts, sounds etc.
The volume is successfully encrypted. Enjoy!