All the files on the encrypted volumes are protected against unauthorized access in any type of situation - loss, thievery, computer/laptop withdrawal or an unwanted user by the computer. And, as we say, it is better to be on the safe side.
First you will need special software for encrypting volumes. This section tells about Cryptic Disk. To download Cryptic Disk go to:
www.exlade.com/en/cryptic-disk/download
1. Launch Cryptic Disk (in the “Start” menu or by clicking the desktop label). The main window of the software and the list of all the volumes and partitions are displayed.
The software is able not only to encrypt physical volumes but also to create encrypted containers. If you are interested in this option you should check the section “How to Create an Encrypted Container”.
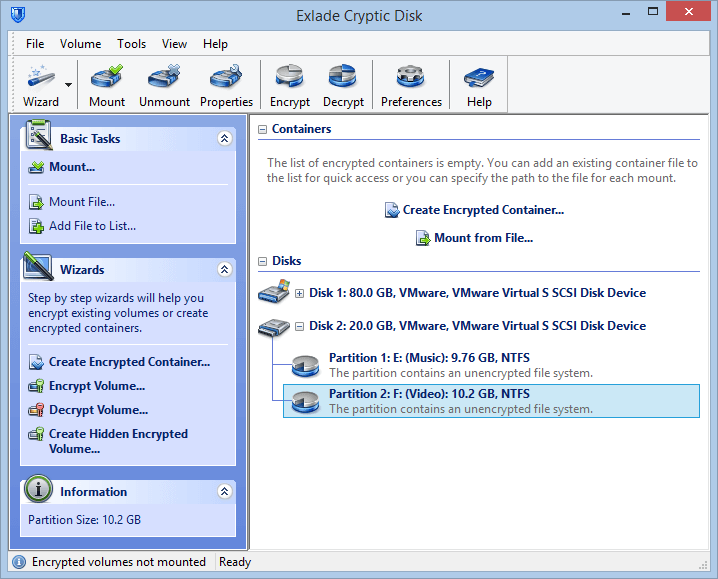
2. Select a volume partition that you want to encrypt in the main window (left-click). It is highly recommended to make a backup copy of all the important files stored in the partition. The backup copy will not only secure the data against all the system failures but also helps to start working with the encrypted volume faster.
So the partition is selected and the backup copy is made. Select the “Encrypt Volume…” option in the main window (for example, in the partition context menu).
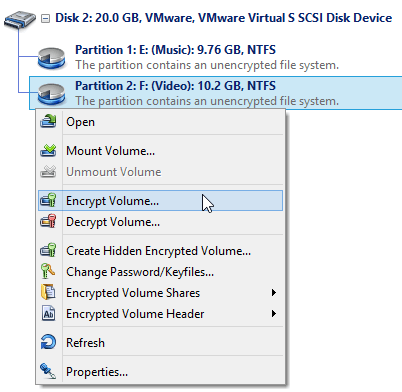
The software will launch the volumes encryption wizard.
3. First select the volume encryption method. Since there is a backup copy of all the data, the data on the volume can be erased. Select the method “Don’t save information during encryption of the volume”. If there is no backup copy you will have to select the other method, i.e. “Encrypt the volume without information loss” (it will take more time, but also depends on the size of the volume to be encrypted).

If you don’t enable the “Write a marker in the encrypted volume header” option no one will be able to prove that the volume is an encrypted one. If you are not going to prove to anyone that the volume is an unencrypted one and its contents is just some unsorted “garbage” you can tick this box to enable the option. It helps the software to detect that the volume is encrypted and puts a respective sign for it in the interface. This option doesn’t affect the protection reliability.
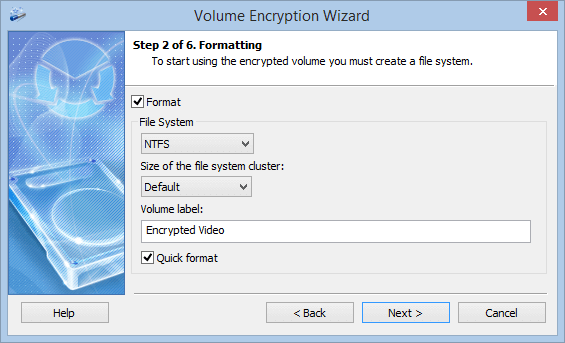
4. Then you can configure formatting parameters (if you selected “Encrypt the volume without information loss” in the previous step the formatting window will not be displayed). “Quick format” option enables you to format faster since it will not format the whole volume from the beginning to the end but will just create a new file system on it. Also you can select a file system, a cluster size and a volume label which will be displayed for the mounted volume in the Explorer. You can disable the format option. Then the software will not format the encrypted volume at all and you will be able to format it on your own after mounting it.
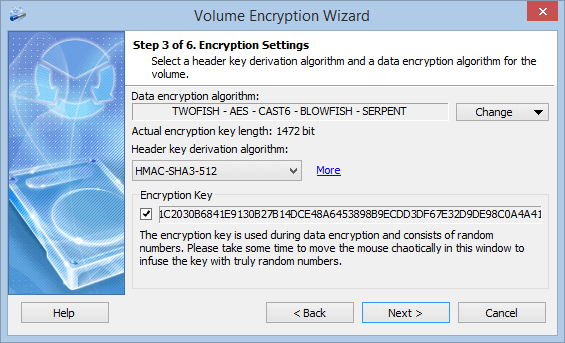
5. Now you can set the volume encryption settings. If you are not an expert in cryptography you can just leave this as is and go to the next step. Otherwise you can change the cryptographic algorithms that are to be used for encrypting data on the volume (Click the “Change …” button).
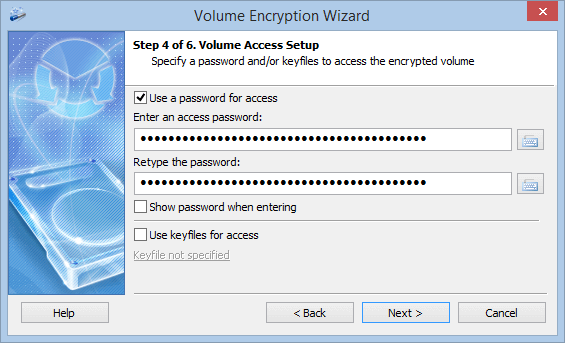
6. Specify the password and if you want you can specify the key files that are to be used for protecting the access to the encrypted data. To protect against key loggers you can use the virtual keyboard embedded into the software. The software will ask the password upon each mounting of the encrypted volume.
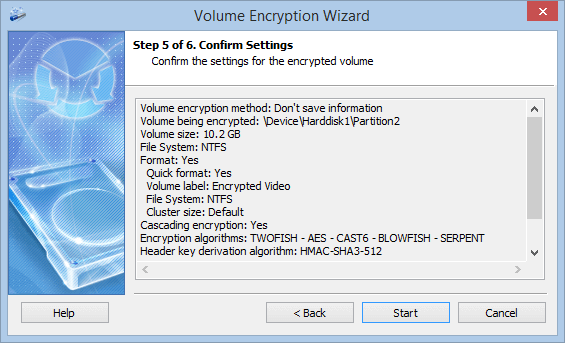
7. All the encryption parameters are set. Check them out in the wizard window and click the “Start” button.
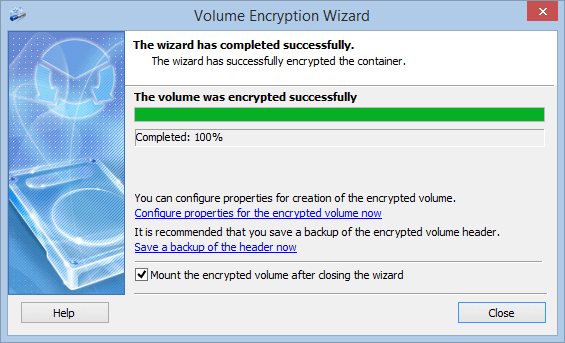
8. When the wizard finishes its work a respective message will be displayed and you will be asked if you want to configure the advanced parameters for the encrypted volume, save a backup copy of the header and mount the encrypted volume.
Mounting
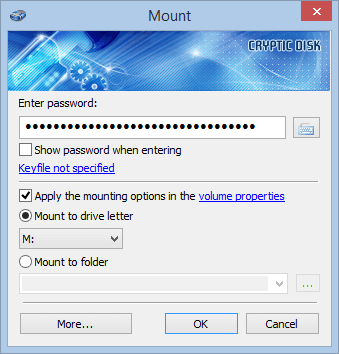
Leave the option “Mount the encrypted volume after closing the wizard” enabled and close the wizard window. The mounting window will be opened. Enter the password specified when encrypting the volume and select any free letter, then click the “OK” button.
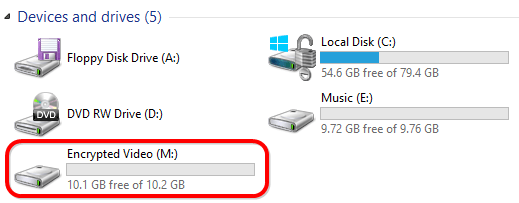
If you enter the correct password the system will display the volume with the letter specified when mounting. You can work with it in the same way as with any normal volume, i.e. copy, modify, replace and delete files. The only difference is that all the data of the volume are actually stored encrypted all the time.
To block access to the encrypted volume you have to unmount the volume (it will be also automatically unmounted upon system shutdown). You can use the main window of the software or the system tray icon menu.

The core of the software icon in the system tray is red when the system detects at least one mounted encrypted volume.
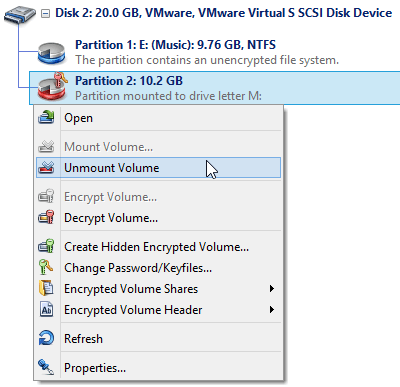
For more convenient work you can configure the encrypted volume “Properties”. Select the encrypted volume in the main window and right-click it, then select the “Properties…” option in the context menu. Here you can configure mounting parameters specifically for this encrypted volume, set hotkeys, add scripts, sounds etc.
The volume is successfully encrypted. Enjoy!